
Class Sites>Photo Fun>
Adobe Photoshop Elements Tutorials
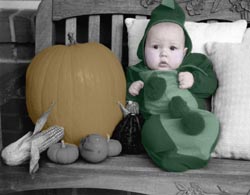
#2-Hand Tinting a Black and White Photo
Skills: Opening a photo, saving a photo, selecting and deselecting, using the paint brush and color palettes. Working with layers, handtinting
Opening a photo: On the Menu Bar left click <click> on File, Open <click>, and then choose the location of your file in the Look in: field. Once in the proper folder, click on the image you wish to edit, Open <click>.
Saving a Photo: You want to keep your original photo unaltered. For this reason, as soon as you open a file, and BEFORE you begin editing you need to SAVE the copy you are working on first.
On the Menu Bar left click on File, Save As <click>, choose the folder you want to save in, in the Save in field, give the photo a new name, While working on a photo save it as a Photoshop document to preserve the layers (.psd, or pdd).When you are finished working on a photo make sure you choose Save As: JPEG (*.jpg, *.jpe), Save <click>. Note: We are saving the photos as JPEG, because it saves hard drive space.
Change Color to Black and White:
1. On the Menu Bar, Enhance<click>, Adjust Color<click>, Remove Color <click>.
2. Save the photo.
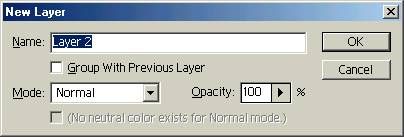
Create a New Layer
1. On the Menu Bar Layers<click>, New, Layers<click>. (Alternately you could use the layer palette and click the new layer icon on the bottom of the palette).
2. Name the layer hand tint, set the layer opacity to 30%, click OK.
Hand Tint your picture
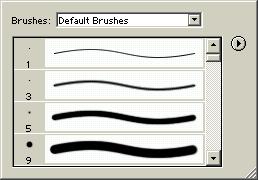
1. On the Tool box, click on the Brush. Choose a brush size from the option bar that opened up. Set the brush opacity to 100%. You can choose a color by clicking on the colored square at the bottom of the tool box and choosing a color from the color palette.
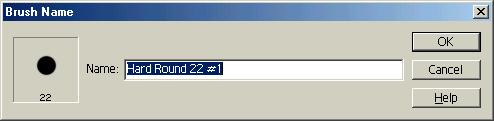
2. If you want to save the brush you have created for use again, or on another project, after you have set the brush options, click on the arrow next to the brush sample window, click the arrow in the circle, and choose New Brush <click> Give the brush a name and click OK.
3.There are two ways to choose colors either from the Color Swatch window, or you can mix any color you like on the Color Picker Window.
· To pick a color from the Color Swatch window, on the Menu Bar , Window<click>, Color Swatch<click>. Click on the color you want to use.
·
To mix a color click on one of the square areas at the bottom of the Tool Box top either the Foreground box, or the Background box. The color picker window will appear. Click on the rainbow until you have selected the color you want. The preview will appear in the box. If you will be using the color more than once, you should add it to the palette by clicking more 8 on the Color Swatch window, , New Swatch <click>, give the swatch a name, and click OK.
· Paint on the Hand Tint layer. If you dont like your results, you can throw away the whole layer and start over again, or you can use the eraser to erase the colors you dont like. If you start over, dont forget to create a new layer on top of the photo so you dont inadvertently color the photo. This step is necessary so you have a translucent layer of color with the photo showing through.
Save the Photo
1. On the Menu Bar left click on File, Save As <click>, choose the folder you want to save in, in the Save in field, give the photo a new name, While working on a photo save it as a Photoshop document to preserve the layers (.psd, or pdd).When you are finished working on a photo make sure you choose Save As: JPEG (*.jpg, *.jpe), Save <click>. Note: We are saving the photos as JPEG, because it saves hard drive space.

| My Portfolio | Choosing a Web Designer | Marketing Your Web Site | Pricing | Contact Me |
![]()
![]()