Publisher
Tutorials

Business CardSkills: Inserting
text and picture frames, formatting text, formatting clip art,
using layout grids, changing picture color, inserting and
formatting lines. Printing tiled documents.
¨Start <click>, Programs, Microsoft Publisher
<click> 2.
Choose a blank business card template from the Catalog. ¨On the top Blank Publications
<click>, in the left hand column Business
Card, Create <click>.
¨In the top box of the Quick
Publication Wizard Color Scheme<click>, in
the bottom window of the QPW Black and Grey<click>.
¨On the Menu Bar, Arrange<click>,
Layout Guides <click>. The margins should be set
for 0.25 for the top, bottom, left, and right (default for business
cards). Use the TAB key on the keyboard to move between
fields. Set the Grid Guides to Columns 2 <TAB>, Rows
2, OK<click>. Note:
the layout guides are non-printing elements, and are used
as a template to position elements on your document.
They help maintain consistency in a multi page document,
and allow you to snap items to predetermined positions.
¨On the menu bar View<click>,
Go to background<click>, Put the arrow pointer on
the guide you want to reposition and hold down the SHIFT key
on the keyboard. Use the mouse to drag the horizontal guide
to the ¾ inch mark from the top of the card.
Use the same method to move the vertical guide to the 1
inch mark from the left hand side.
¨On the menu bar View<click>,
Go to Foreground<click> Note: You must be in the foreground view to design your document.
¨Click on the Line Tool on the Object tool bar (left hand tool bar). Position the line on the blue vertical grid 1 from the left. Set the line color to black, and the width to medium. ¨Click on the Line tool on
the Object tool bar. Position
the line on the top,blue, grid line.
Set the line color to dark grey and the width to heavy.
¨Click on the Clip Gallery
Tool, position the
pointer in the location you want to insert the clip art <click>. The gallery will open, choose a clip
art, click on your selection, then click on the top choice on
the pop up. Close the clip art gallery.
¨Using the Arrow, <click> on the image. Position the Arrow/pointer on the corner selection handle, left click and drag to resize. Note: Using the corner handles keeps
the proportions of the image correct.
¨Using the Arrow Right
click on the image, select Copy<click>. Right
click, Paste<click>.
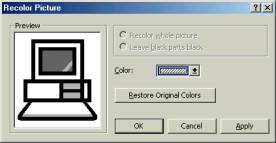
¨Right click, Change
Picture, Recolor Picture <click>. ¨Click the drop down arrow
in the color box, and <click> on the desired
color. Repeat for other two images, making each one lighter than
the previous one.
¨On the Objects Tool bar (left hand tool bar), click on the Text Tool (the A). Insert the text frame in the area you want your name to appear. Enter your First and Last name using a 10 point Bold Font. ¨If the name Text Frame overlaps the border lines, and you would like the border lines to show through: Select the text frame <click>, on the keyboard, hold down the Ctrl +T keys. This will make the Text Frame transparent so background images show through. ¨Add your title, name, and other personal information, use a 8.5 point font. Printing your Business Cards
You can purchase business card stock especially
made for your printer at a computer or stationary store. One popular brand is Avery. These
directions are for 2 X 3 ½ cards that come 10 to a standard
sheet.
¨ On the menu bar, View<click>
Zoom<click>, 100% OR
on the Tool Bar, click on the drop down arrow in the Zoom
box and choose 100%.
¨From the Menu Bar File<click>,
Print<click>, on the Print dialog box, Page
Options <click>. On
the Page Options dialog box click the radial button next to Print
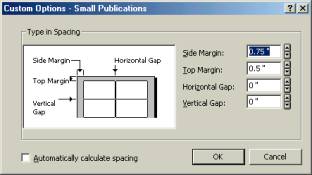
multiple copies per sheet. Click on Custom Options. ¨In the Custom Options dialog box, set the Side Margin to 0.75.
set the Top Margin to 0.50 set the Horizontal Gap to 0 set the Vertical Gap
to 0 Click the OK button. ·
You should see a display showing a layout with 10
business cards on the Page Options dialog box, <click> the OK button. ·
You are
now ready to print. Do
a test print on regular paper before you print on your card stock. ·
Most card
blanks come with a Practice Sheet.
Lay your printout on top of the practice sheet to make
sure the cards will align correctly with the card blanks. ·
This sheet
will also provide you with the correct Side, Top, Horizontal and
Vertical measurements if your cards are different than the ones
in this example. |
| My Portfolio | Choosing a Web Designer | Marketing Your Web Site | Pricing | Contact Me |
![]()
![]()